
One Hundred and Twenty Abstracts
.
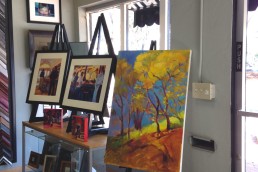
From November 2019 to March 2020, I created one hundred and twenty, 6” x 6” Cold Wax and Oil paintings, including mixed media on sheets of Arches Oil Paper.
Each painting started with a line using Art Graf. I then either added home made paper, stencil, charcoal, and other mixed media, combined with Oil and Cold wax medium.
My initial intention was to become familiar with abstract design and mark making. Each sheet was a theme of color. Sometimes, I kept in sync with my original intention and sometimes, I surpisingly veered off. But all times, I found something new about myself.
I love working on Arches oil paper. It doesn’t need to be gessoed. Paint and medium can be directly applied to the paper without concern. It also allows for such wonderful marks and texture and shows off the oil paint beautifully.
Painting from the inside out causes you to repeat things that have meaning for you. I started to recognize patterns and marks that are my own.
I decided to pull my favorites from the one hundred and twenty studies and further the series by increasing the size. I am able to increase the 6” x 6” to 36” x 36” using a roll large roll of Arches Oil Paper. I have so many ideas and content, I can’t wait to get started. More on this next week.
Wish me luck!
PS I have posted some of the smaller paintings and they are also available in my portfolio if you are interested


Breakthrough
When you have a breakthrough, you may think it is happening overnight, but what is actually happening is a natural progression from developing more knowledge and experience through the process of doing and learning.
Here are some of the major art experiences that have transformed my artwork.
- Taking workshops in 2016-2017 with Melinda Cootsona, Pauline Agnews, Karen Kaapcke and Martin Campos.
2. Completing the 100 Figure Challenge with Tina Berendsohn on Facebook. The drawings evolved from drawing figures to paintings the female figure over a two year period from 2018-2019.
3. Creating 120 abstract paintings over a six month period from 2019-2020.
The day by day changes in my work over the period of these last 4 years have helped me expand my repertoire of expertise in being able to express myself from the inside out with more ease than I have ever had before.
I remember a significant breakthrough happened in September of 2018. All that I learned about the figure, plus the new knowledge I gained from a variety of mediums and tools have catapulted me into a different level. My style started to be natural to me and not forced.
I have been creating art consistently for the last 30 years, and finally feel confident and free to create what I want without fear. I have had more breakthroughs, because of this willingness to experiment, plus the increased amount of work I created.
Thank you for following me and I promise this year to be more diligent keeping you up to date.

FEAR (False evidence that appears real)
How much fear have you built into your life? Some fears are obvious threats and some are so subtle you don’t realize that you have them. As of now, we have a definite outside threat. How odd, being isolated forces us to come to grips with our values and lifestyle.
I have just realized that not only has my fear escalated, because of the coronavirus it, has also made me aware of the small fears that I live with daily that consume me. The virus has forced me to face my daily fears and ask “why must I have these”? Are these fears forced upon myself, or are the actually valid.
How often are we faced with going into our studio looking at the blank canvas and recognizing that we are afraid? Why? Rationally, it doesn’t make sense that we would be afraid of a benign canvas. The canvas isn’t going to jump out at you and attack you. It does though, bring up our vulnerability to being judged not only by ourselves, but also the fear of other's criticisms. We may feel that we are not worthy as well, or afraid that our visions cannot come to fruition.
So many fears we have developed over the years and the news and advertising industry has not helped the situation. We have become brainwashed and believe things that are not true.
We also have forgotten how powerful we are as an individual and look too much for others to solve our problems.
I do believe for me that this pandemic has forced me to come to grips with my fears and also discover my strengths. All of a sudden, believing I am gluten sensitive becomes a hoax I developed in my mind. How many other things have I caused myself to believe that are not true?
What we once thought was important isn’t as important anymore. I only hope that after this is all over that I remember what I have learned and don’t back to things as usual. This is a time to reevaluate what is true and what isn’t, what is of value and what isn’t, and what should continue in our lives and what needs to be thrown away. [recent max=1 template=caption/]
Journey of a Thousand Miles

I am taking a break from Facebook. I am also remodeling my kitchen. And I am 68 years old. What do all these things have in common? Well things inevitably change. What used to work for me is not working for me anymore. I love "most" of the people I follow on Facebook, but I realized that it was not a great use of my time, especially when I am remodeling my kitchen. Time is valuable and it is more evident as I get older.
I have walked at least a thousand miles and yet where have I ended up? Have I become all that I want to be at 68 years old? Has my art been a success? All these are good questions. I don't want to be walking aimlessly, but to have goals and desires that pull me and fill me.
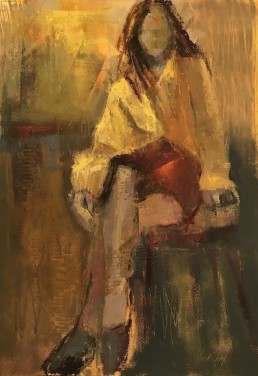
My life has become too serious and I almost forgotten how to play. Can you enjoy, have fun and still be productive and successful? Playing has taken me on a new journey with my subject matter. My new journey as an artist is creating abstract art using the female figure. I am focusing on one thing; women in all sizes and shapes. Using stencils, mixed media, charcoal, oil pastel, pallet knives, large brushes, and painting on Arches oil paper, has resulted in the most surprising and interesting textures that can only be appreciated in person. And in the process I am having fun.
From now on this is my requirement for doing my art. I must have fun and enjoy, otherwise it becomes drudgery for me. Using the tools above opened my eyes to successfully creating and satisfying the child in me at the same time.
"Chances" is the name of the painting above. It measures 18" x 26", available for purchase. The first statement is an entire abstract painting, next a figure drawn in charcoal then layered with oil paint using larger brushes and pallet knife. I used a roller, as well, to loosen up the work and create soft edges. Scraping and stencils under and over the figure were also used to create interest.
Please contact me if you are interested in purchasing or have any questions in regards to "Chances". I also would love hearing from you and any comments you may have on your journey.
I hope you enjoy this new way of my creating. Thank you for your time!

Maximize Your Art Studio
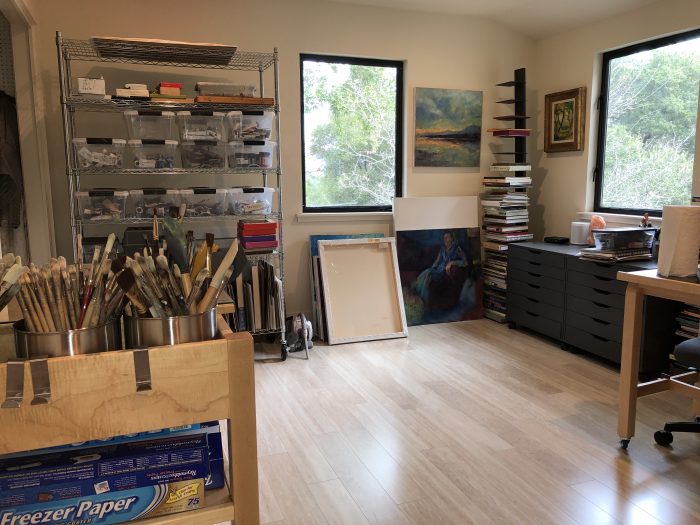
My art studio is only 143 square feet. In order to maximize my space, I had to be creative. I also wanted to make sure that there was flexibility and mobility of the furniture used and find extra storage where you wouldn't normally. It was important that the furniture and flooring was impervious to paint and that accidental spills were easily cleaned.
Home Depot provided a great selection of flooring. I chose Pergo Laminate. The price is very reasonable. There are many styles of Pergo, but all are not equivalent in regards to staining. I brought samples home and found that XP Vanilla Travertine was excellent even though very light in color was impervious to stain. I chose the most highly saturated pigments of oils to test. All came off with a cleansing wipe. It was that easy. As a plus, I found out after installation that the floor is a floating floor, the cushioning is very forgiving on the body especially during longer sessions at the easel.

You don't have to reinvent the wheel, the internet has many ideas to improve organization, as well as, help you create more valuable storage. I'm going to share my Art Studio Pinterest board that is chock full of ideas that will improve your studio. Although, it took some time to create this Pinterest board it saved me so much time and money.
Extra storage for my closet was installed by California Closet. I love the file drawers, the peg boards that have wire racks and plenty of shelves for open storage. Taking off the closet doors also gave me more space exteriorly.

Now for the furniture! All my furniture in the art art studio are on rollers, except for the book towers. The rollers allow each piece of furniture the ability to be used in more than one way, can be stored in one area and brought out when ready to use. If you can't go out then you must go up was the reason for my next choice; the 77" high Wire Shelving rack. I wouldn't have a clue where I would put all my art supplies without this item. Clear plastic tubs storage for acrylic and oil paint fit perfectly. The rack not only was able to hold all my art supplies, but with a few extra materials, peg board and dowels, created upright storage for small paintings.
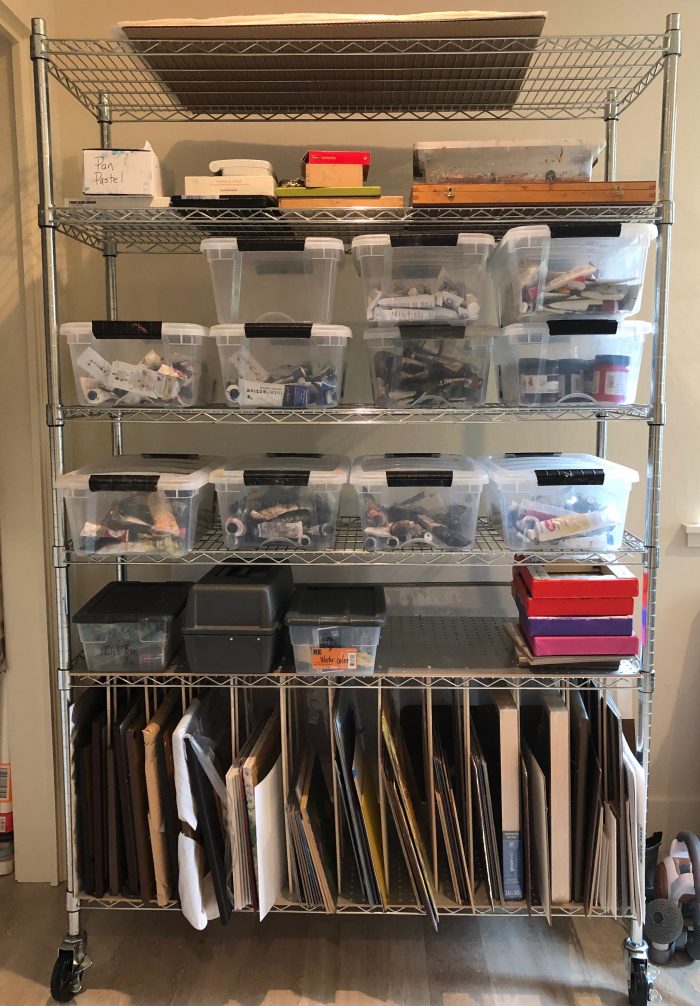
I had previous book towers for my art library. There are many places that you can purchase them. The towers both fit perfectly in the nook, one framing each side of two Alex Drawer Units that have six drawers each. This is a great alternative for filing paper art, that normally would cost a fortune, when purchasing furniture specifically meant for art storage.

My beautiful art cart was designed to be my pallet, protected by a glass top cut to size. The cart also contains all my brushes placed in cylinders that fit perfectly in the cubby, pallet knives, rollers etc., hooks for garbage bags, and extra art supplies. If you have any interest in the cart and you live in the vicinity, my friend said he would be happy to design more. He is an excellent craftsman.
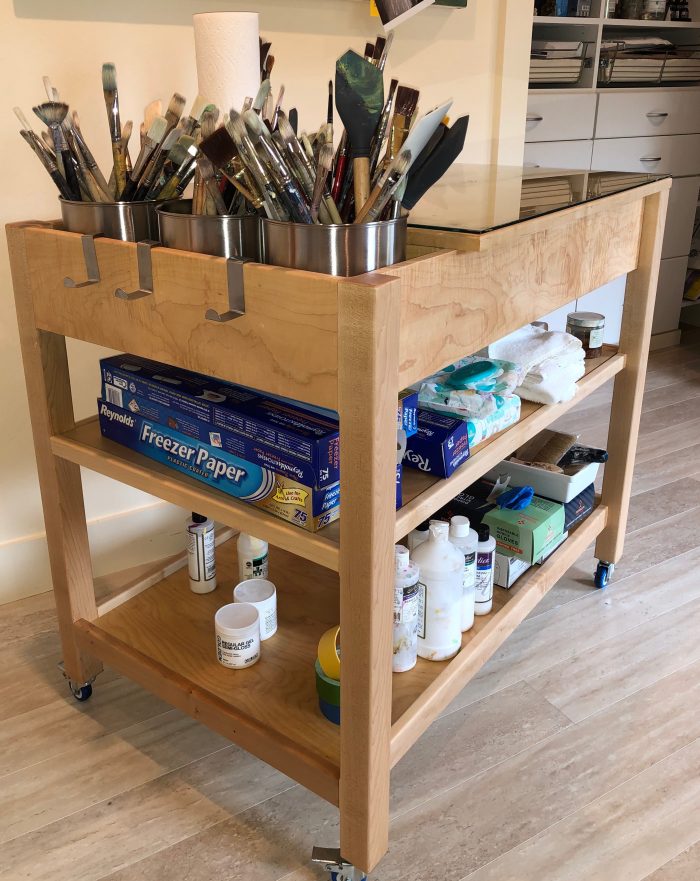
He also helped me design a desk with a side table. This is probably my favorite piece in the studio. The table can lie flat or one side lifts up creating an easel for smaller artworks. This table is excellent. It is so functional and could be used in so many ways. I can use it to draw, as well as paint smaller pieces and when the easel partition drops down, the table can be used as a larger pallet. Cover the table with Reynold Freezer paper lay your paint down, use and dispose when done; making it easy for a quick cleanup.

Now last but not least, one of my pride and joy pieces from Paper Bird Studio and Design. The 66" x 66" Red Oak wall easel made by Jason Tueller . This wall easel probably saves me a third of my studio space. All the material used to make this easel came from one Appalachian Red Oak and hand made. For as much work that went into this product I find it extremely worth the purchase. The easel gives you the ability to paint more than one painting at a time as well as by sliding the mounts together a large painting can be created.

If you have any questions please put in comments below. And also I would love any suggestions or ideas that you may have to share in creating your studio. Thank you!